
A proper guppy tank setup is the foundation of everything. Get it right from the beginning and your guppies will be healthy, colorful, active, and long lived. Get it wrong and you will spend weeks troubleshooting disease outbreaks, poor colors, and unexplained deaths that all trace back to how the tank was built in the first place.
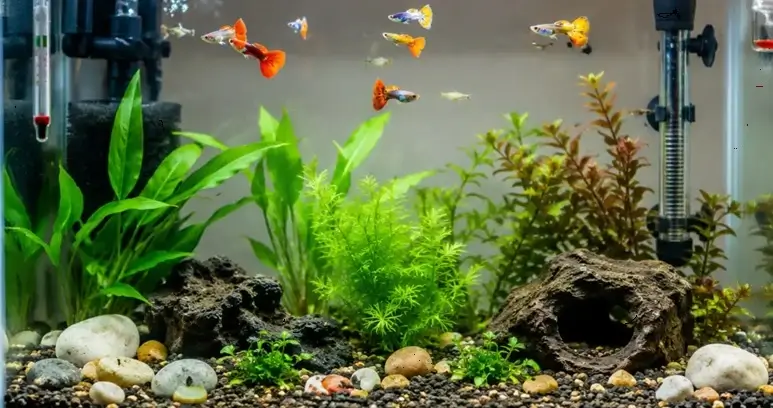
Guppies aquairum setup does not have to be complicated or expensive. What matters is understanding the basics — the right tank size, the right filter, stable water conditions, and enough plant cover to make your fish feel secure. Everything beyond that is refinement.
Quick Navigation
➜ Guppy Tank Setup – Step by Step
➜ Step 1: Choose the Right Aquarium Size
➜ Step 2: Adding Substrate to the Tank
➜ Step 3: Install the Filter and Heater
➜ Step 4: Fill the Tank Halfway with Water
➜ Step 5: Add Plants and Natural Decorations
➜ Step 6: Fill the Tank with Water and Dechlorinate It
➜ Step 7: Start the Filter and Heater
➜ Step 8: Cycle the Aquarium Before Adding Fish
➜ Step 9: Slowly Acclimate Your Guppies
➜ Step 10: Help Your Guppies Settle In
➜ Planted Guppy Tank Setup
➜ Common Guppy Tank Setup Mistakes
➜ Guppy Tank Maintenance Tips
➜ Frequently Asked Questions
Guppy Tank Setup – Step by Step
Setting up a guppy tank can feel overwhelming when you look at everything involved — tank, filter, heater, substrate, plants, cycling, acclimation. But when you break it down into steps, the process is simple and manageable even for complete beginners. Follow this sequence and you will avoid the most common mistakes that cause early fish losses.
Step 1: Choose the Right Aquarium Size
A 10 gallon tank is the best starting point for most beginners. Select your tank and place it in a location where there is electric socket to plugin your heater, Filter, Light and air buble motor.
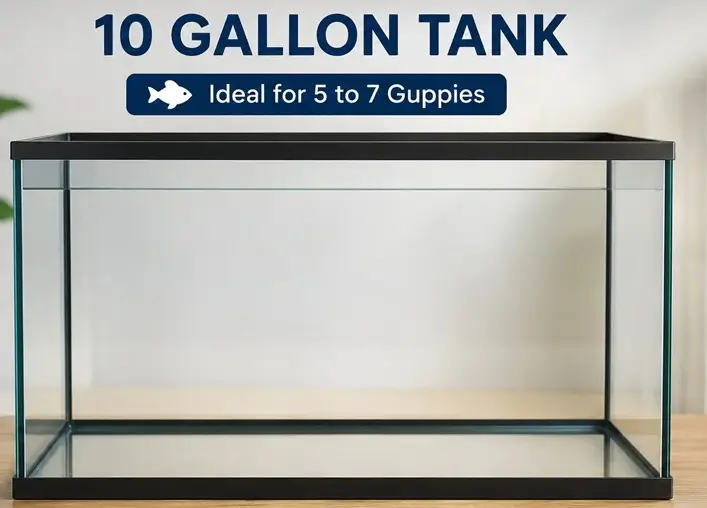
10 Gallon tank :
• Large enough to maintain stable water parameters — small volumes of water swing faster and give you far less room for error.
• Widely available and affordable — easy to find at any pet store or online.
• Forgiving of the small mistakes every new fishkeeper makes along the way.
• Tanks smaller than 10 gallons can work, but they’re far less stable and need more frequent maintenance to keep parameters safe.
• Choose a long, wide tank over a tall, narrow one. Guppies are horizontal swimmers that spend most of their time in the middle and upper water column, so they benefit far more from swimming length than from depth. Also oxygen dissipation from atmosphere is more in wider tanks.
Fish stocking guide by Tank Size:
• 5-Gallon Tank: Limit to 3–4 all-male guppies. Avoid mixing sexes because guppies breed frequently and will quickly overload the tiny water volume.
• 10-Gallon Tank: Limit to 5–7 guppies or 6–8 in an all-male group. This allows enough swimming space and easier water quality maintenance.
• 15-Gallon Tank: Limit to 8–12 guppies or 12–15 in an all-male group.
• 20-Gallon Tank: 12–20 guppies in a mixed-sex group, or up to 20–25 in an all-male group — the easiest size for beginners to manage.
Step 2: Adding Substrate to the Tank
A guppy tank does best with a suitable substrate, plenty of live plants, and safe decorations that provide cover while still leaving room to swim.
Best Substrate Choices:
• Marble stones or chips: If you are not planning to have dense plant cover the you can use this option. Marble is composed of calcium carbonate — it slowly dissolves into the water, raising the pH, GH (general hardness), and KH (carbonate hardness).
• Dark Gravel: Looks natural, keeps fish waste on the surface for easy vacuuming, and highlights the vibrant, colorful fins of guppies.
• Fine Gravel: Safe for bottom-grazing fish, prevents debris from sinking deep into toxic pockets, and securely anchors live plants.
• Natural Sand: It is smooth enough not to damage their delicate fins, mimics their wild environment, cost effective and also allows dense plants to grow easily
• Aquarium Soil: Very good choice and works well if you want a heavily planted tank.
Once you have your tank in position — and it should be in its final position before you add anything, because a full aquarium is extremely heavy and should never be moved.
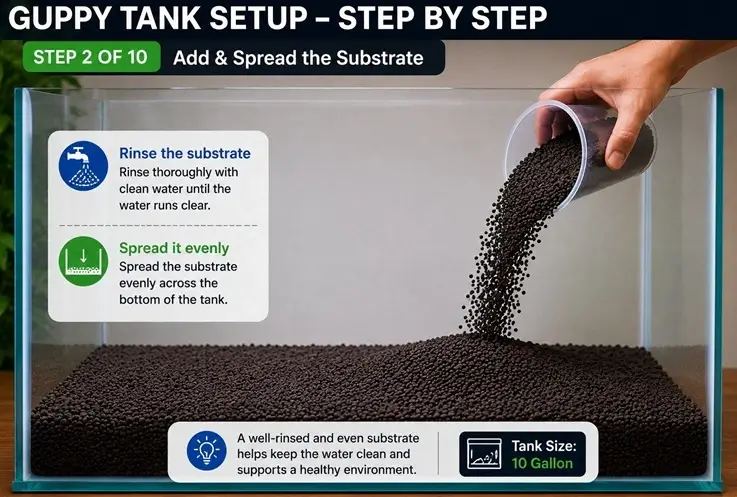
Rinse substrate thoroughly and spread it across:
• Rinse your chosen substrate thoroughly under running water until the water runs clear. Even pre-washed substrate can cloud your tank badly if added without rinsing.
• Spread it evenly across the bottom to a depth of around 2 to 3 inches, enough to anchor live plants properly and give beneficial bacteria plenty of surface area to colonize.
Recommended substrate amounts by tank size:
➜ 5 gallon tank: 5–8 lbs
➜ 10 gallon tank: 10–15 lbs
➜ 20 gallon tank: 20–30 lbs
Step 3: Install the Filter and Heater
Install your filter and heater before filling the tank completely with water. Position the heater near the filter outlet or in an area of good water movement so that heat distributes evenly throughout the tank rather than creating warm and cold spots.
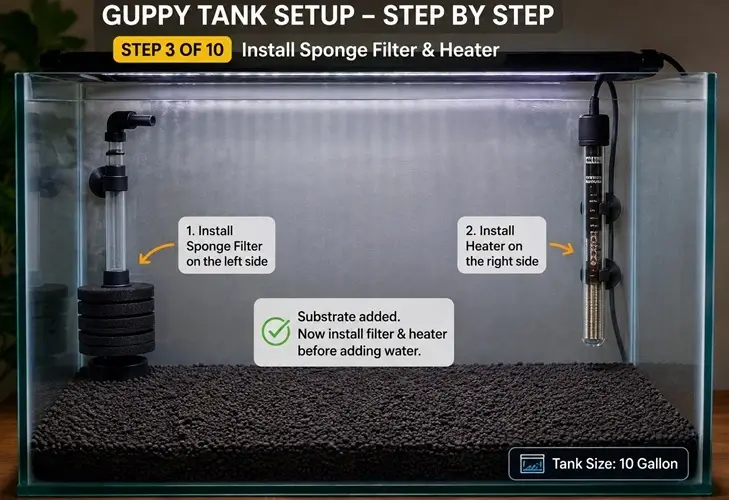
• Never switch on the heater or filter before adding water. Running a heater dry, even for a few minutes, can crack the glass element or burn it out permanently, and you’ll need to replace it before it works again.
Filter Choices for Guppy Tank:
Sponge Filter:
A gentle sponge filter is the best choice for 5 to 10 gallon guppy tanks. It is safe for guppy fry, since there’s no strong intake to suck them in. If you’re using a hang-on-back or internal power filter instead, cover the intake with a pre-filter sponge or mesh to protect fry, and baffle the outflow if it creates a strong current, since guppies get stressed swimming against strong water currents.
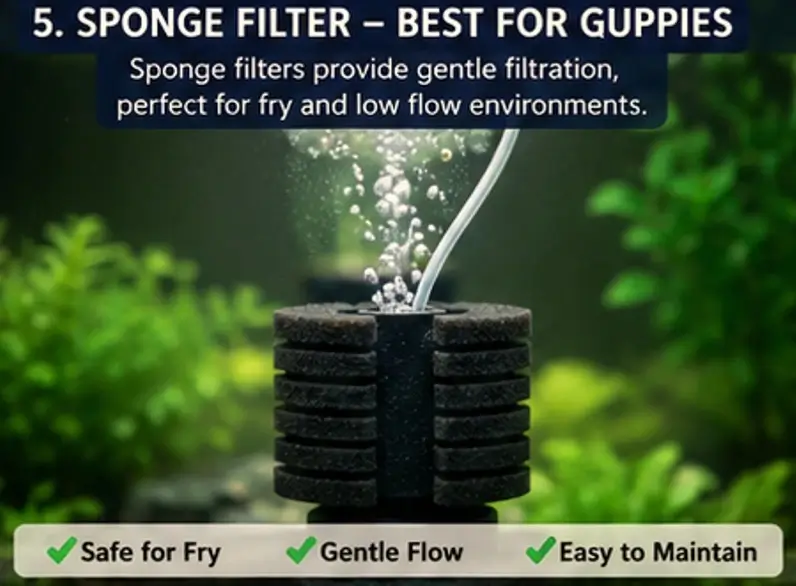
Sponger filters are budget-friendly, Traps debris and hosts beneficial bacteria while adding oxygen bubbles.
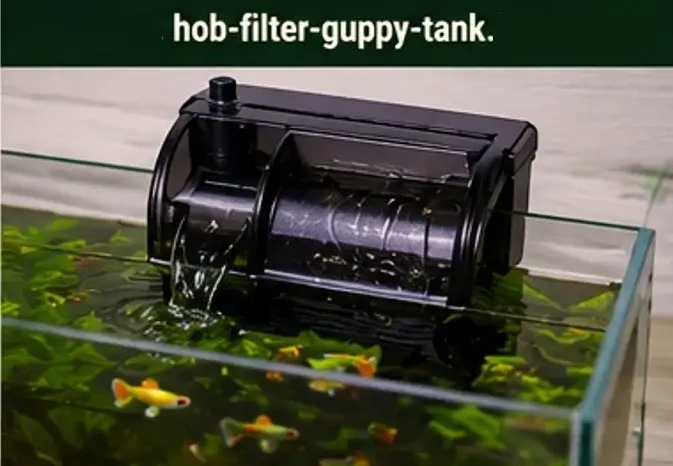
Hang-on-Back (HOB) Filters:
HOB filters are best for 15 to 20 Gallon tanks. Hangs on the rear glass, leaving more swimming room inside the tank and good for larger community tanks needing robust. You must cover the intake tube with a pre-filter sponge or mesh to protect Guppy fry and small fish.
Canister Filter:
A canister filter is best for 20+ Gallon tanks. A canister filter is an external water cleaning system for fish tanks. These filters sit outside the tank and use hoses to pump water and filter through heavy layers of sponge, ceramic rings, and carbon.
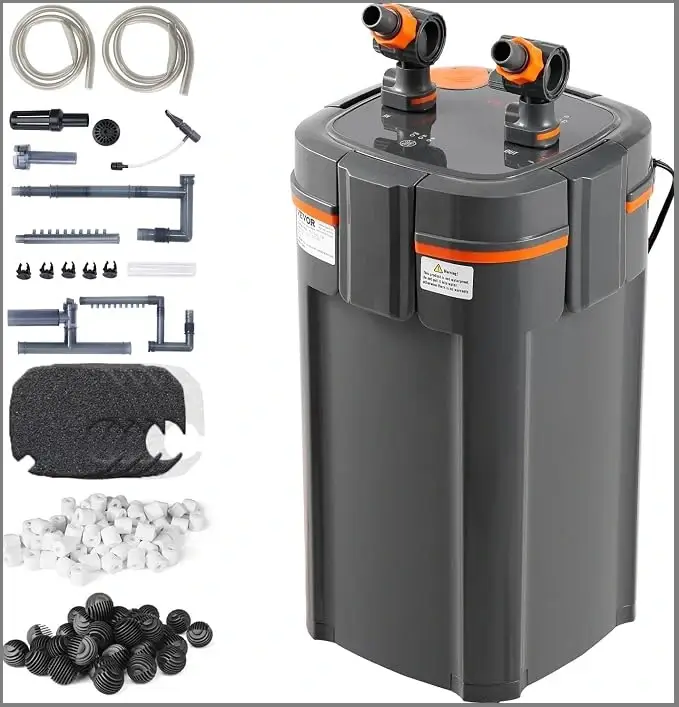
Canister filter provides quiet operation, adjustable flow control, and reliable water circulation. You need to cover the inlet valve with mesh so that it odensot suck the Guppy fry and small fish.
Do Guppies Need an Air Pump?
• An air pump is not always necessary. Guppies need adequate oxygen in the water, but if your filter creates enough surface movement for good gas exchange, a separate air pump is usually not essential.
• Tank shape also affects oxygen levels. Wide, shallow tanks have more water surface exposed to the air than tall, narrow tanks, allowing greater gas exchange. I have successfully kept guppies in wide, shallow outdoor tanks with live plants, no filter, and no air pump, although these setups required more frequent maintenance. Good surface area, natural airflow, and healthy plants helped maintain adequate oxygen levels.
That said, an air pump with an airstone becomes especially useful in:
• Overstocked tanks. More fish waste increases oxygen demand and can reduce available oxygen.
• Warmer tanks. Warm water naturally holds less dissolved oxygen, making good surface movement more important.
• Breeding tanks. Fry benefit from stable, well-oxygenated water, particularly when stocking levels increase.
• Limited surface movement. If your filter creates little disturbance at the water surface, gas exchange may be inadequate.
• Guppies gasping at the surface. This can indicate low oxygen or another serious water-quality problem. Increase surface agitation immediately and check your water parameters.
Recommended heater by tank size:
Guppies need a stable water temperature between 72°F–82°F (22°C – 27°C) . Aim for a standard rule of 5 watts of heater power per gallon of water, meaning a typical 10-gallon tank requires a 50-watt adjustable submersible heater
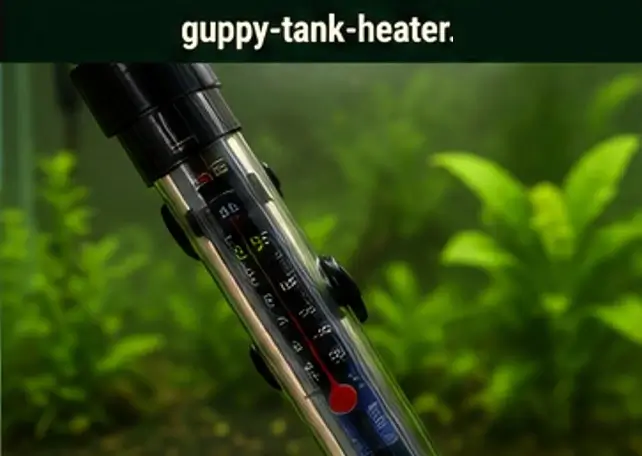
• 5 Gallon Tank: 25-watt submersible heater
• 10 Gallon Tank: 50-watt adjustable heater
• 15 Gallon Tank: 50-watt to 75-watt heater
• 20 Gallon Tank: 75-watt to 100-watt heater
Choose a model with an adjustable dial rather than a preset one so you can fine-tune the temperature.
Step 4: Fill the Tank Halfway with Water
Fill the tank halfway with water, pouring it slowly to avoid disturbing the substrate. Filling the tank halfway makes it easier to plant the plants and arrange the decorations without disturbing the substrate.
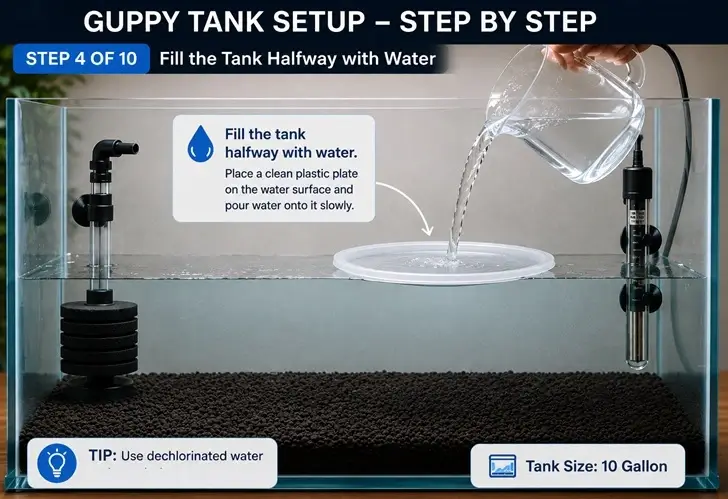
Place a clean plastic plate on the substrate and slowly pour water onto the plate. This helps disperse the flow and prevents the water from disturbing the substrate or uprooting the plants.
Step 5: Add Plants and Natural Decorations
Plants and decorations should go in before you fill the tank completely. Most hobbyists find it easiest to fill the tank halfway first, as the water helps you see how everything will look and makes positioning much easier than working in an empty dry tank.
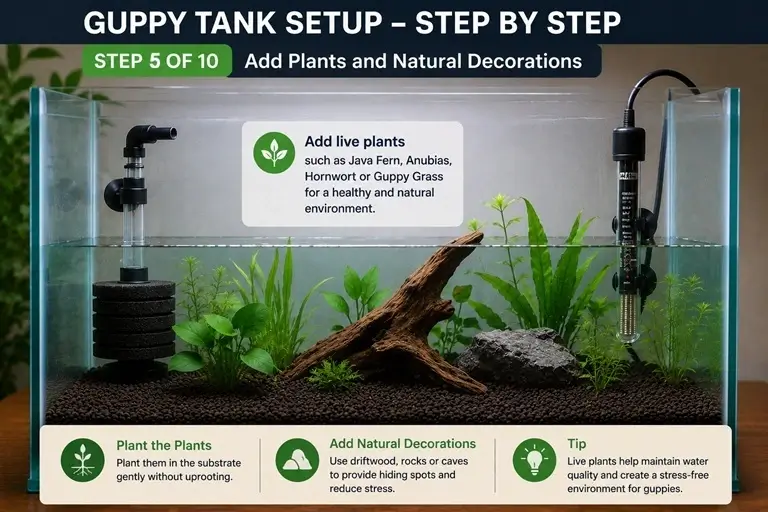
• Planting in a fully filled tank can make it harder to anchor the plants securely, as the water movement may cause them to uproot.
• Fancy guppies have long flowing tails that tear surprisingly easily on rough surfaces, and a torn tail is an open invitation for fin rot and other diseases.
• Choose smooth driftwood, rounded rocks, and aquarium caves with no sharp protrusions
Live plants are strongly recommended over articifial ones:
• They actively absorb nitrates and improve oxygen levels
• They compete with algae for nutrients
• They give guppies, especially newborn fry, somewhere to hide and feel safe
• A well planted tank is far more stable and easier to maintain than a bare one, and guppies are visibly less stressed when plant cover is available
• Artifical decorations will only stress the fish making their habitat look artificial.
Good beginner plant choices – floating and bushy one:
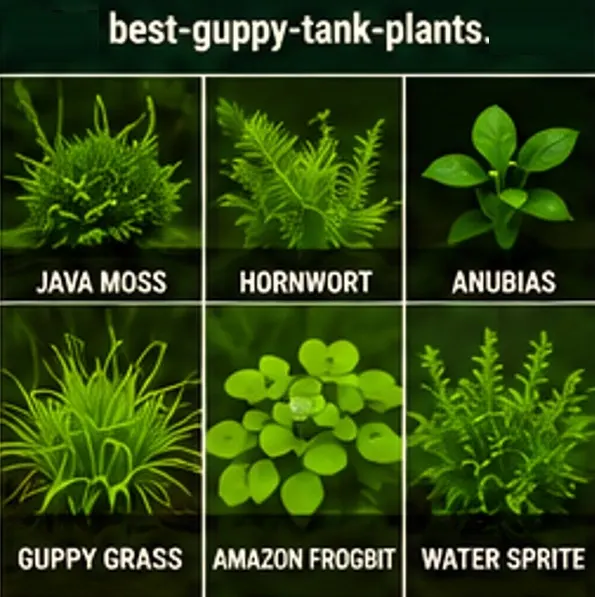
• Guppy Grass: Grows fast whether floating or planted in substrate, and offers some of the best cover available for newborn fry.
• Hornwort: Extremely hardy with dense, needle-like foliage that makes it hard for adult guppies to reach fry hiding inside it.
• Water Sprite: Adapts to floating or rooting in gravel, growing into large, bushy clumps that soak up excess nutrients quickly.
Good beginner plant choices – low-maintenance and hardscape:
• Java Moss : Ties easily to driftwood or rocks, traps tiny bits of food, and shields bottom-dwelling fry from adults.
• Anubias : Broad, tough leaves that don’t need to be planted in substrate — just tie it to a decoration, and it holds up well even in an active tank.
• Water Wisteria: A fast grower that helps stabilize water parameters and tolerates moderate to low light without issue.
Lighting for Guppy Tanks
Good lighting brings out the best colors in your guppies and supports healthy plant growth without encouraging algae.
For most beginner guppy tanks a basic LED aquarium light is all you need. LED lights are the best choice because they are:
➜ Energy efficient and low running cost
➜ Long lasting — most last several years
➜ Available in intensities suitable for beginner to advanced planted tanks
➜ Low heat output — will not warm your tank water
➜ Avoid old style fluorescent or incandescent bulbs — they generate unnecessary heat and are far less efficient than modern LED options.
How long should lights be on?
• Provide 8–10 hours of light per day. Less than 8 hours can slow plant growth, while more than 10 hours can encourage algae without providing much additional benefit to plants or fish.
• Use an automatic timer. Consistent lighting helps establish a predictable day-and-night cycle for your guppies and prevents accidentally leaving the lights on too long.
• Reduce lighting if algae becomes a problem. Cutting the photoperiod to around 7–8 hours per day is a good first step before trying other methods to control algae.
Step 6: Fill the Tank with Water and Dechlorinate It
Fill the tank slowly and carefully to avoid disturbing your substrate and uprooting plants you have just positioned. Place a clean plastic plate on the substrate and slowly pour water onto the plate. This helps disperse the flow and prevents the water from disturbing the substrate or uprooting the plants.
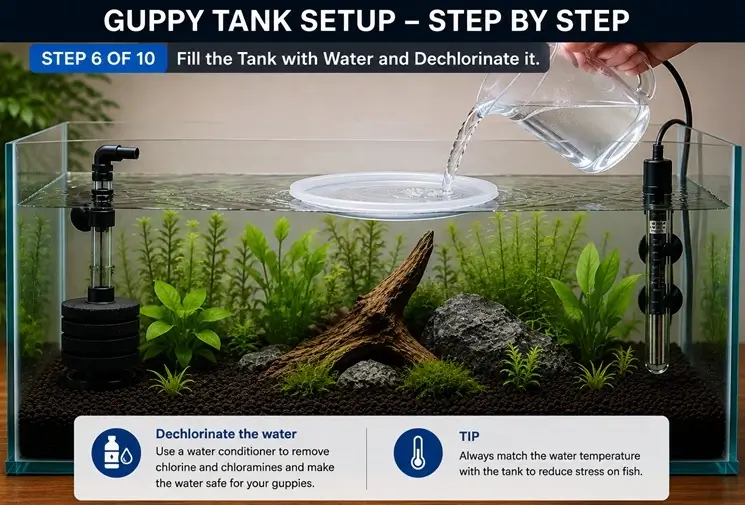
• Do not fill the tank completely to the brim. Leave a gap of around two to three inches at the top — this prevents overflow, and since guppies occasionally jump, it also keeps them from landing outside the tank.
• Before adding any fish, treat the water with a quality dechlorinator. Tap water contains chlorine and chloramine, both toxic to fish and destructive to the beneficial bacteria in your filter.
• Seachem Prime is the most widely trusted option in the US. It neutralizes chlorine and chloramine instantly and also temporarily detoxifies ammonia, which makes it especially useful in a newly set up tank.
Step 7: Start the Filter and Heater
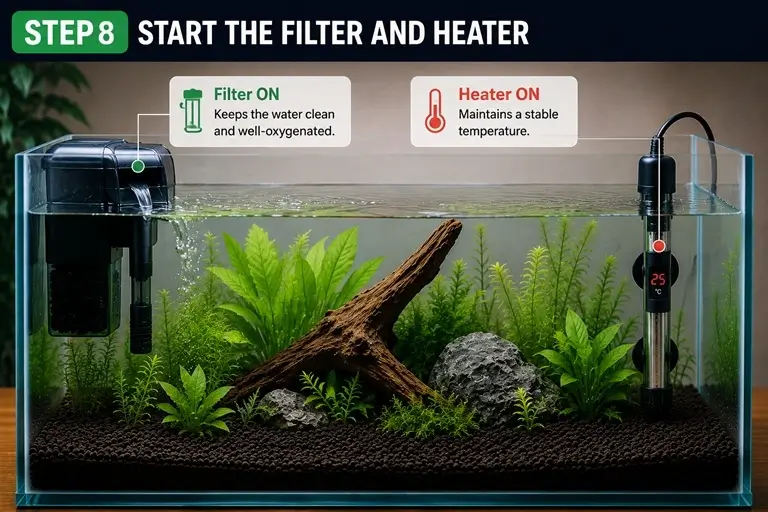
Once the tank is filled and the water has been treated with a dechlorinator, you can safely switch on the filter and heater. Never turn the filter or heater in a dry tank as it can damage the filter motor and the heater element permanently.
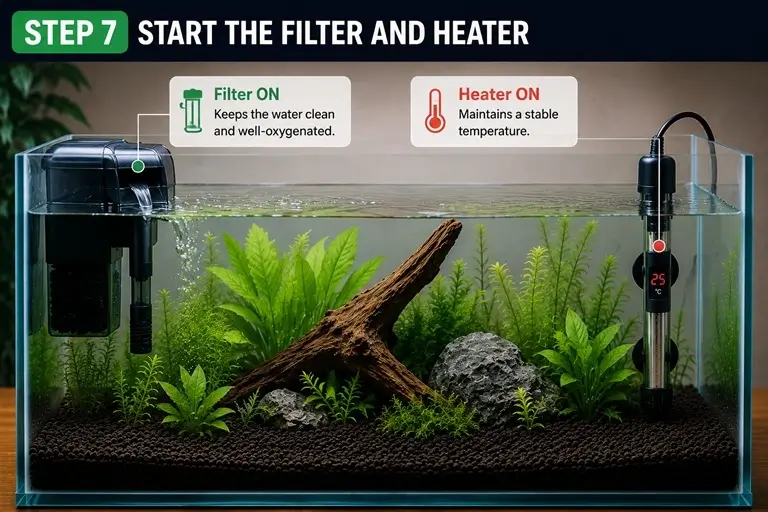
Allow the tank to run for several hours before doing anything else.
During this time check that everything is working as it should:
➜ Water is circulating visibly from the filter outlet
➜ Heater light is on and maintaining temperature
➜ No unusual noises from the filter or heater
➜ No leaks around the tank seal or equipment fittings
➜ Air bubbles rising steadily if using an air pump
• Give the heater enough time to bring the water up to your target temperature of 76°F to 78°F (24°C to 26°C) before moving to the next step. In a cold room this can take a couple of hours, so be patient.
• Use a digital thermometer probe placed in the water for a far more accurate reading than a stick-on glass thermometer, which measures the glass surface temperature rather than the actual water temperature.
Step 8: Cycle the Aquarium Before Adding Fish
This is the step most beginners skip and the single most common cause of early fish deaths. Before your guppies go in, the tank needs to complete the nitrogen cycle, the process by which beneficial bacteria establish themselves in your filter and substrate, converting toxic ammonia into nitrite and then into the far less dangerous nitrate. See our guppy ammonia guide for symptoms and emergency steps if a spike happens anyway.
• A brand new tank has no established bacterial colony at all. Add fish too early and ammonia from their waste will spike rapidly with nothing to process it, leading to what’s known as new tank syndrome — a condition where ammonia and nitrite climb to dangerous levels within days, causing stress, disease, and death even in fish that looked perfectly healthy at the pet store.
• Most aquariums take 4 to 6 weeks to fully cycle naturally from scratch, but you can speed this up significantly by adding established filter media or substrate from a healthy existing tank. Beneficial bacteria colonize every surface in contact with water, not just the filter, so moving fish, filter media, and substrate together from an established tank can cycle a new one remarkably fast — sometimes within 24 to 48 hours in ideal conditions.
• Test your water every few days during cycling, and only add guppies once both ammonia and nitrite read zero consistently on two or three consecutive tests.
A properly cycled tank will consistently show:
➜ Ammonia: 0 ppm
➜ Nitrite: 0 ppm
➜ Nitrate: some detectable level confirming the cycle is working
Step 9: Slowly Acclimate Your Guppies
Never add new guppies directly into the tank — this is one of the most common and damaging mistakes beginners make. The water in the transport bag almost certainly differs from your tank in temperature, pH, and hardness. Dropping fish straight into different water conditions causes immediate shock that weakens their immune system and can trigger disease within days even if the fish looked perfectly healthy at the store.
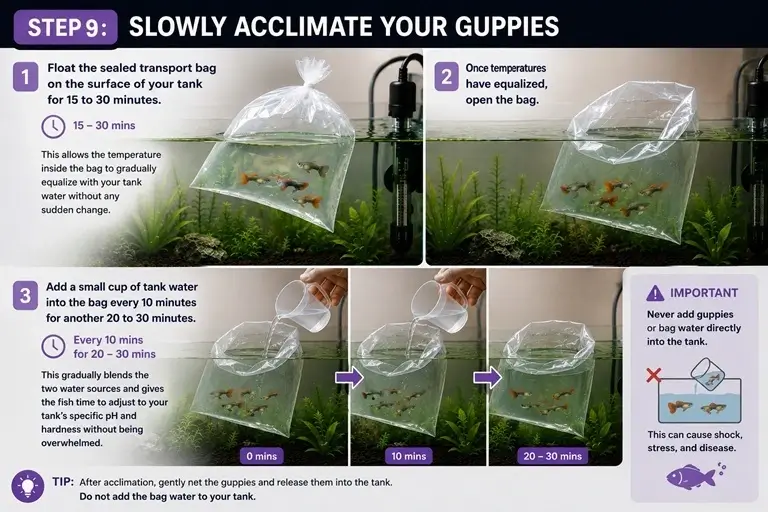
The process is simple but needs to be done patiently.
• Float the sealed transport bag on the surface of your tank for 15 to 30 minutes — this allows the temperature inside the bag to gradually equalize with your tank water without any sudden change.
• Once temperatures have equalized, open the bag and add a small cup of tank water into it every 10 minutes for another 20 to 30 minutes. This gradually blends the two water sources and gives the fish time to adjust to your tank’s specific pH and hardness without being overwhelmed.
• When you’re ready to release the fish, use a net to transfer them rather than pouring the bag water into your tank. Pet store water can carry pathogens, parasites, and bacteria that you don’t want introducing to your aquarium.
• Some experienced fishkeepers give new fish a brief preventative treatment before adding them to their main tank, particularly if buying from a store where tanks are visibly overcrowded or unhealthy looking.
Step 10: Help Your Guppies Settle In
Once your guppies are safely inside the tank, turn the lights off for a few hours and leave the tank undisturbed.
• Darkness helps them calm down. A new environment is stressful for fish, and low light helps them settle and begin exploring without feeling exposed.
• Resist the temptation to watch them constantly or tap the glass. Give them space to settle.
• Hiding or ignoring food for the first day or two is completely normal. It’s not a sign something is wrong, most guppies become noticeably more active and confident within 48 hours once they feel secure.
• Avoid overfeeding during the first 24 hours. A newly established tank is particularly vulnerable to ammonia spikes from uneaten food, and stressed fish are unlikely to eat normally anyway. Offer a very small amount on the first day and remove anything uneaten after a few minutes.
Over the following days, watch for signs your guppies have settled in well:
➜ Active swimming and exploration
➜ Healthy appetite returning within 48 hours
➜ Bright coloration
➜ Normal breathing, not gasping at the surface
➜ Social interaction with other fish
If you notice gasping at the surface, clamped fins, or unusual lethargy beyond the first two days, test your water immediately and check if there is enough air flow into the tank. In a newly set up tank, ammonia is the most likely culprit and needs to be addressed quickly.
Planted Guppy Tank Setup
A planted guppy tank is one of the most rewarding setups you can build, it looks beautiful, keeps water cleaner naturally, and creates an environment where guppies actually thrive rather than just survive.
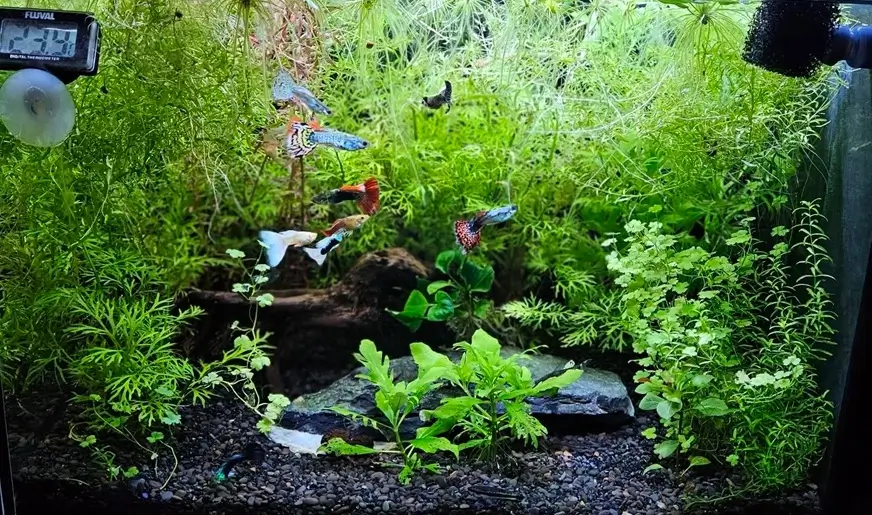
Do Plants Need Special Equipment ?
• Most guppy plants don’t need special equipment. Java moss, hornwort, guppy grass, anubias, frogbit, water sprite, and java fern can grow successfully under basic LED lighting without CO2 injection or liquid fertilizers. Regular water changes usually provide enough nutrients for healthy growth in a typical guppy tank.
• More demanding plants may need extra nutrients. If you want to grow plants like Amazon sword, vallisneria, or stem plants in a heavily planted aquascape, a basic liquid fertilizer added weekly and a nutrient-rich planted substrate can give better results. For a beginner guppy tank, however, basic equipment is usually sufficient.
• Use a good filter to keep the tank clear. An HOB or canister filter can remove fine substrate dust and suspended particles before they settle on plant leaves, helping keep the water clear and allowing plants to receive adequate light.
• Aquasoil is useful for more demanding plants. Plants with extensive root systems generally grow better in nutrient-rich planted aquarium soil than in plain gravel. If you want a cheaper option, fine sand can also work well for many rooted plants, provided it is not packed too tightly.
• Use good-quality aquarium lighting. Planted tanks need adequate light for healthy growth, and a light with an automatic timer is ideal. Aim for around 8–10 hours of lighting per day, especially for densely planted setups.
• Consider CO2 for demanding plants. If you want to create a heavily planted or demanding aquascape, a CO2 system with a regulator, solenoid valve, needle valve, bubble counter, diffuser, and drop checker can provide the additional carbon dioxide needed for stronger plant growth.
How to Layout a Planted Guppy Tank
The most natural and visually appealing planted tanks follow a simple three zone layout, foreground, midground, and background, with plant heights increasing from front to back so every plant is visible and light reaches everything evenly.
Foreground — front of the tank:
➜ Low growing plants like dwarf hairgrass or mini anubias
➜ Smooth stones and small decorations
➜ Keep this area open for guppies to swim freely
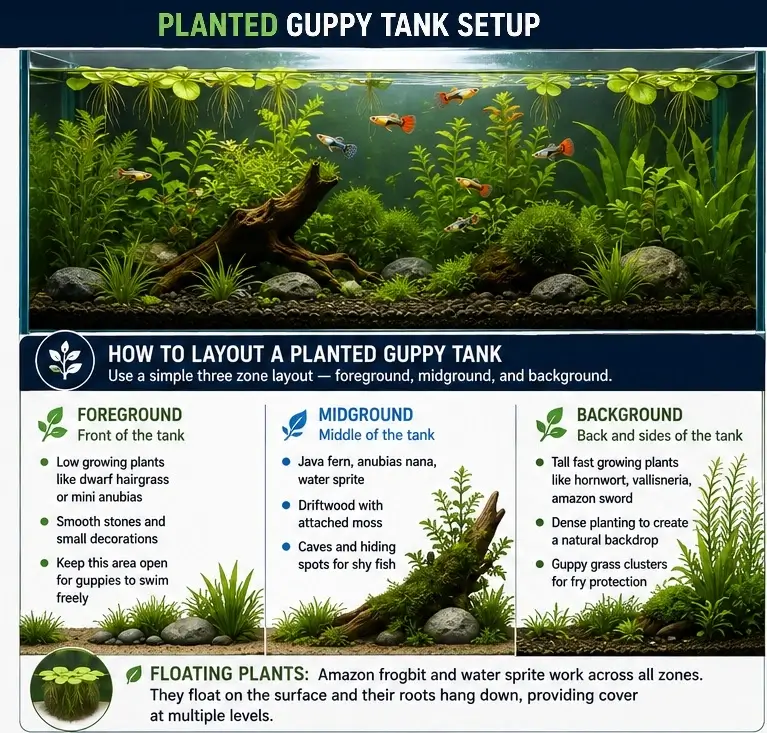
Midground — middle of the tank:
➜ Java fern, anubias nana, water sprite
➜ Driftwood with attached moss
➜ Caves and hiding spots for shy fish
Background — back and sides of the tank:
➜ Tall fast growing plants like hornwort, vallisneria, amazon sword
➜ Dense planting to create a natural backdrop
➜ Guppy grass clusters for fry protection
Floating plants like amazon frogbit and water sprite work across all zones — they sit at the surface and their roots hang down into the water column providing cover at multiple levels simultaneously.
How Many Plants Do You Actually Need?
• More plants generally mean a more stable guppy tank. A heavily planted tank with around 60–70% of the substrate covered by plants can provide more nitrate uptake, plenty of cover for guppies, and greater competition with algae.
• A lightly planted tank offers fewer benefits. If you’re adding plants, aim for enough coverage to provide meaningful shelter and contribute to overall tank stability.
Managing Plant Growth
Fast growing plants like hornwort and guppy grass will need regular trimming to prevent them overtaking the tank. Trim them back whenever they start blocking light from reaching lower plants or covering too much of the surface. Removed trimmings can be replanted, given to other fishkeepers, or composted, they should never be released into natural waterways.
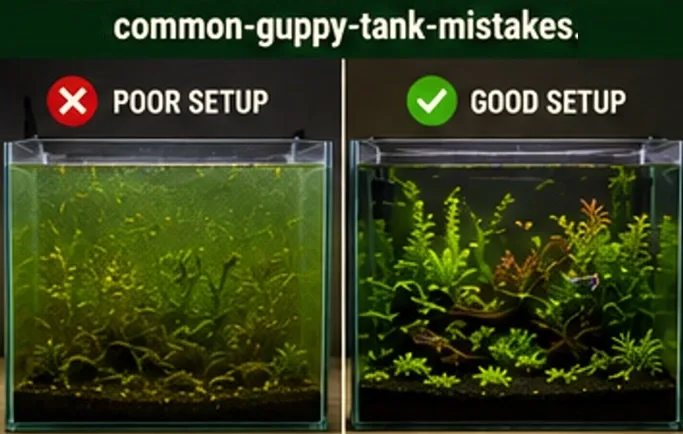
Common Guppy Tank Setup Mistakes
Even well intentioned beginners make mistakes when setting up their first guppy tank.
These are the most common ones:
➜ Overstocking
➜ Skipping the nitrogen cycle
➜ Overfeeding
➜ Poor filtration
➜ Strong water current
• Avoid overstocking. Guppies are small, but adding too many fish to a limited space creates excess waste, rapidly rising ammonia, and chronic stress. Stock conservatively, and remember that guppies breed quickly — a comfortable number can double within weeks.
• Always cycle the aquarium before adding fish. A new tank does not yet have enough beneficial bacteria to process ammonia from fish waste. Adding fish too early can cause toxic ammonia spikes and lead to fish deaths even when the water looks perfectly clear. See Step 7 for the full cycling process.
• Avoid overfeeding. Uneaten food quickly breaks down and releases ammonia into the water. Feed only what your guppies can consume within two to five minutes and remove any uneaten food promptly. Read our best guppy food guide for detailed feeding recommendations.
• Use adequate filtration. A filter that is too small for your tank or stocking level may not provide enough biological filtration to process waste efficiently. Choose a filter rated for at least your tank size, and consider going one size larger if you plan to stock heavily or breed guppies.
• Avoid excessively strong water currents. Guppies are not particularly strong swimmers, and fancy varieties with large, flowing tails can struggle against powerful water flow. Strong currents can exhaust guppies, damage delicate fins, and cause chronic stress. Choose gentle filtration and baffle strong filter outlets when necessary.
Guppy Tank Maintenance Tips
Even the best setup will deteriorate quickly without a consistent maintenance routine — water quality, fish health, and plant growth all depend on it.
A good maintenance routine covers these key tasks:
➜ Water changes
➜ Gravel vacuuming
➜ Algae cleaning
➜ Filter maintenance
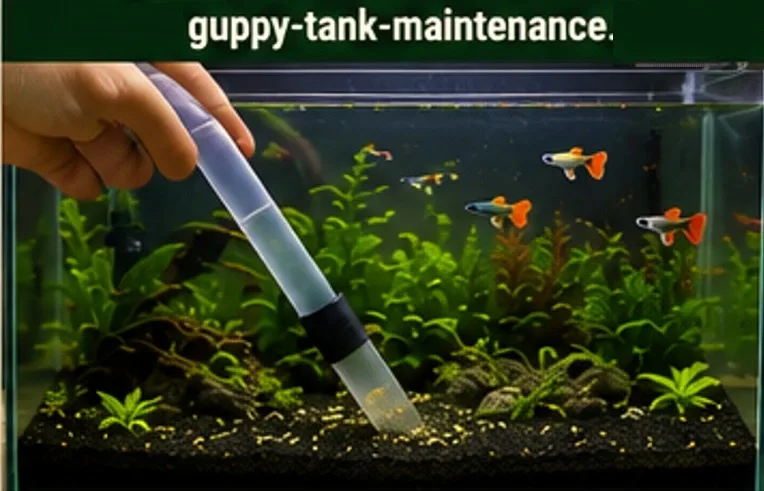
• Perform regular water changes. This is the most important routine maintenance task. Most guppy tanks do well with a 25–30% water change each week. This removes accumulated nitrates, replenishes minerals, and helps keep water parameters stable. Always treat new water with a dechlorinator and match its temperature closely to the tank water. In well-filtered, lightly stocked tanks with live plants, water changes every 10–14 days may be sufficient, but test your water regularly to confirm the parameters remain safe.
• Vacuum the gravel during water changes. A gravel vacuum removes uneaten food and fish waste that settles between the substrate. Removing this debris helps prevent it from breaking down and contributing to rising nitrate and ammonia levels.
• Clean algae from the glass. A magnetic algae scraper makes this quick and easy. Run it along the inside of the glass during water changes, then siphon out the loosened algae along with the old tank water.
• Maintain the filter regularly. Rinse filter sponges in old tank water about once a month to remove accumulated waste without destroying the beneficial bacteria living in the sponge. Avoid cleaning the filter and performing a large water change on the same day, as doing both can remove too much beneficial bacteria at once.
Frequently Asked Questions
Do guppies need aquarium lights?
Yes — but their requirements are not demanding. A basic LED light running 8 to 10 hours daily is sufficient for both fish health and beginner plant growth. Using a timer is strongly recommended to maintain a consistent day and night cycle, which reduces stress in fish and supports healthy plant growth.
Can guppies live in community tanks?
Yes. Guppies are peaceful fish that do well with other calm non aggressive species. Good tank mates include corydoras, mollies, platies, small tetras, and rasboras. Avoid fin nippers like tiger barbs and aggressive fish that will stress or injure guppies. For a full breakdown of compatible species visit our guppy tank mates guide.
How do I set up a guppy fish tank?
Choose a 10 gallon tank as your starting point, add and rinse your substrate, install your filter and heater, fill the tank halfway using a plate to protect the substrate, add your plants and decorations, finish filling the tank, run the equipment for several hours to confirm everything works, cycle the tank for 4–6 weeks before adding fish, then acclimate your guppies slowly. See the full step-by-step walkthrough above for the complete process.
What size tank do guppies need?
A 10 gallon tank is the best overall starting point for most guppy keepers — stable enough for beginners without being unnecessarily large. A 5 gallon can work for a small, male-only group, and a 20 gallon gives you more room for breeding or a heavily planted display. See our full tank size breakdown above for stocking numbers by tank size.
What is the best tank for guppies?
A long, wide, rectangular tank suits guppies far better than a tall, narrow one, since they’re horizontal swimmers that use length more than depth. Watch out for “portrait” or tall-style tanks sold under the same gallon rating — they hold the same water volume but in a shape that works against how guppies actually swim.
How do I set up a guppy aquarium?
The process is the same whether you call it a tank or an aquarium — pick the right size, cycle it properly before adding fish, and keep water parameters stable from day one. See our complete step-by-step guppy tank setup walkthrough above for the full process, equipment list, and timing for each stage.
How long does a guppy tank take to cycle?
Most tanks take 4 to 6 weeks to cycle naturally from scratch. You can speed this up significantly by adding established filter media or substrate from a healthy existing tank — sometimes cycling in as little as 24 to 48 hours. Never add guppies before ammonia and nitrite both read zero consistently.
How do I stop guppies eating their fry?
Dense planting is the most effective solution. Java moss, guppy grass, and floating plants like amazon frogbit give newborn fry immediate hiding spots the moment they are born. A breeding box or separate fry tank is the most reliable option — read our guppy fry guide for complete fry care advice.
What’s the difference between a 20 gallon Long and a 20 gallon High tank?
Same water volume, very different shape. A 20 gallon Long runs roughly 30 x 12 x 12 inches, while a 20 gallon High runs closer to 24 x 12 x 16 inches. Always choose the Long for guppies — more swimming length for horizontal swimmers, and around 20% more surface area for oxygen exchange at the same gallon rating.
Which filter is best for a guppy tank?
It depends on whether you’re breeding. If you’re keeping fry, use a sponge filter — there’s no strong intake to suck them in. If you want the clearest water in a display tank with no fry present, a hang-on-back filter with a sponge pre-filter on the intake works well. For larger tanks, many hobbyists run both together.
Does substrate color affect guppy color?
Yes, noticeably. Guppies display more vibrant color against dark substrate — the contrast makes reds, blues, and yellows stand out in a way light-colored gravel doesn’t. It’s a purely cosmetic effect, not a health one, but worth choosing deliberately if color is a priority.
Do I need to check tank dimensions, not just the gallon size?
Yes. Tanks sold under the same gallon label aren’t always the same shape — some “portrait” or tall-style tanks hold the same water volume as a standard tank but in a much taller, narrower footprint that works against how guppies actually swim. Always check the listed length, width, and height, not just the gallon number.
Can guppies live with bettas?
Generally not recommended. Male bettas are territorial and will often attack guppies — particularly males with large colorful tails that resemble rival bettas. Some fishkeepers have success with carefully chosen individual bettas in heavily planted tanks, but the risk is high and the combination is best avoided by beginners.
What is the minimum tank size for guppies?
A 5 gallon tank is the smallest practical size for guppies, suitable for a small group of 3 to 5 fish. However a 10 gallon is strongly recommended for beginners — it is more stable, more forgiving, and significantly easier to maintain.
Can guppies live without a heater?
In genuinely tropical climates where room temperatures consistently stay between 76°F and 80°F (24°C to 27°C) year round, guppies can survive without a heater. Many fishkeepers in countries like India, the Philippines, and parts of Southeast Asia keep guppies successfully without one, including large-scale outdoor breeding setups.
One thing to know: room temperature and water temperature are not the same. Water heats and cools much more slowly than air, so a room sitting at 76°F doesn’t guarantee your tank water is actually 76°F — it can run several degrees cooler, especially overnight when room temperatures naturally dip even in warm climates. If you’re going heater-free, it’s worth actually measuring your water temperature with a thermometer at different times of day rather than relying on the room’s reading alone.
Conclusion
A well planned guppy tank setup is the foundation of everything. The fish that thrive long term — staying healthy, displaying their best colors, breeding successfully — are almost always the ones kept in tanks that were set up thoughtfully from the beginning with the right equipment, properly cycled water, and enough plant cover to feel secure.
Whether you are building a simple 10 gallon starter tank, a heavily planted display aquarium, or a dedicated breeding setup, the principles are the same. Stable water, gentle filtration, good plants, and consistent maintenance — get these four things right and guppies will reward you with years of color, activity, and endless fascination.
As someone who has kept guppies in everything from wide shallow outdoor tanks to planted indoor aquariums, the one thing I can say with confidence is that the effort you put into the setup pays back many times over in the health and vibrancy of your fish.